Difference between revisions of "A Simple Plugin"
m (Introduction For Developers moved to A Simple Plugin) |
(→Configuration) |
||
| Line 205: | Line 205: | ||
== Configuration == | == Configuration == | ||
| − | Configuration of the application is controlled by | + | Configuration of the application is controlled by XML files, including one main xml file and one xml file for each plugin component. The main xml file can be specified as a command-line argument to geWorkbench, or a default XML file will be chosen if none is specified. A schema for this configuration file is available. See <tt>geWorkbench/src/org/geworkbench/engine/config</tt> for some example configuration files. |
A typical configuration directive for the above exmaple component is as follows: | A typical configuration directive for the above exmaple component is as follows: | ||
Revision as of 18:42, 25 April 2010
|
Developers Home | A Simple Plugin | geWorkbench Archive Files | Collaborative Development | Design Documentation | Javadocs | gForge Page | Report Defects |
This introduction introduces the basic concepts for geWorkbench developers. It also walks through the creation of a simple component.
Contents
Introduction
geWorkbench is a component-based application framework. All functionality of the software is provided by components which can be added, removed and configured in a flexible way. All the visual plugins, analysis tools and even file filters are implemented as components.
Application Layout
The application framework allows for a pluggable "skin" that controls how components are displayed to the user. The details of plugging in a new skin are out of the scope of this document. Here, the focus will be on the default skin.
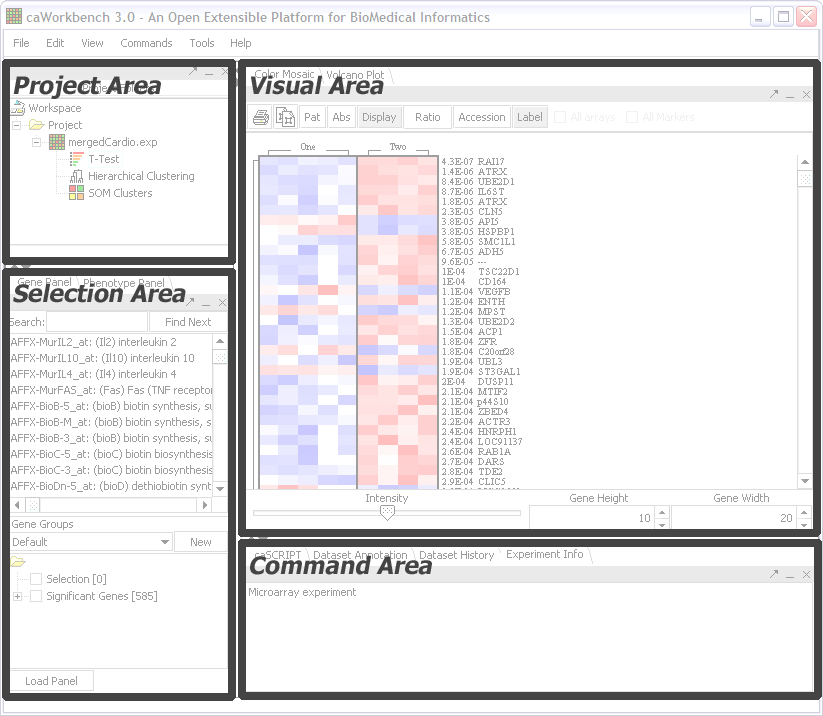
There are four main areas in geWorkbench:
Project Area
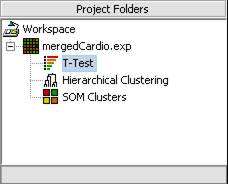
This area contains the Project Panel. This is where data files are loaded and the results of analyses are made available. It is the primary way the user interacts with the software. Selecting a data set in the Project Panel affects what is visible in the other areas of the application.
Selection Area
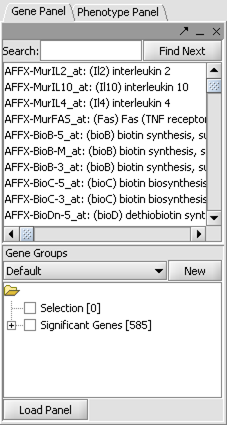
This area contains the components that allow the searching and selection of data set elements. For example, microarray sets have phenotype and gene (probe) selector panels.
Visual Area
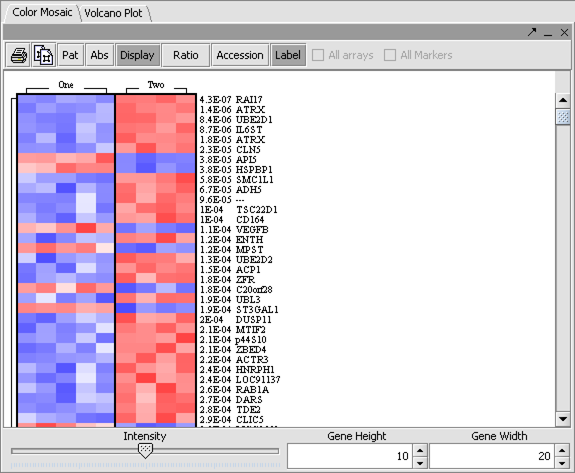
This area contains visualization components for the data set currently selected. Large, self-contained components will also likely appear in this area.
Command Area
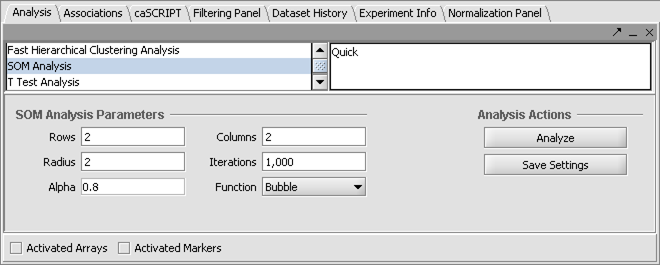
Analysis components and other miscellaneous components are found in the Command Area. Many of these anlyses result in the creation of ancillary data sets which appear in the Project Panel.
Component Model
File filters, anlyses and visual plug-ins are all components in geWorkbench. This section will cover the basics of the component model by developing a simple example component.
Example Component
A simple visual component that operates on microarray sets will be developed. A microarray set is a set of related microarray experiments, each operating on the same chip type and with the same probes. The example component will simply display the number of microarrays in the microarray set as well as the number of markers (probes).
The Source
Here is the source for the example component in its entirety. The code will be examined in detail in the following sections.
 @AcceptTypes({DSMicroarraySet.class})
 public class ExampleComponent extends JPanel implements VisualPlugin {

     private DSMicroarraySet microarraySet;
     private JLabel infoLabel;

     public ExampleComponent() {
         infoLabel = new JLabel("");
         add(infoLabel);
     }

     public Component getComponent() {
         // In this case, this object is also the GUI component.
         return this;
     }

     @Subscribe public void receive(ProjectEvent event, Object source) {
         DSDataSet dataSet = event.getDataSet();
         // We will act on this object if it is a DSMicroarraySet
         if (dataSet instanceof DSMicroarraySet) {
             microarraySet = (DSMicroarraySet) dataSet;
             // We just received a new microarray set,
             // so populate the info label with some basic stats.
             String htmlText = "<html><body>"
                     + "<h3>" + microarraySet.getLabel() + "</h3><br>"
                     + "<table>"
                     + "<tr><td>Arrays:</td><td><b>" + microarraySet.size()
                     + "</b></td></tr>"
                     + "<tr><td>Markers:</td><td><b>"
                     + microarraySet.getMarkers().size()
                     + "</b></td></tr>"
                     + "</table>"
                     + "</body></html>";
             infoLabel.setText(htmlText);
         }
     }
 }
Class Declaration
 @AcceptTypes({DSMicroarraySet.class})
 public class ExampleComponent extends JPanel implements VisualPlugin {
The class declaration is prefixed with a Java 1.5 annotation called AcceptTypes. This annotation indicates what data sets on which this plugin will operate. It takes an array of java.lang.Class parameters. Each class specified must be assignable to DSDataSet, the root class of all data sets. Leaving the annotation out completely will result in the component to be present in the interface at all times.
The declaration itself indicates that the components implements VisualPlugin. This interface specifies that the component is visual. Non-visual components such as file filters and analyses do not implement this interface.
Fields and Constructor
private DSMicroarraySet microarraySet;
private JLabel infoLabel;

public ExampleComponent() {
    infoLabel = new JLabel("");
    add(infoLabel);
}
A no-arg constructor is required, as the component will be instantiated by the application engine.
VisualPlugin
public Component getComponent() {
    // In this case, this object is also the GUI component.
    return this;
}
This method is the realization of the VisualPlugin interface. The application engine calls this to acquire the java.awt.Component. In this case, the component itself is a JPanel, so it is simply returned. This method should always return the same object for the lifecycle of the instance.
@Subscribe Methods
@Subscribe public void receive(ProjectEvent event, Object source) {
  ...
}
Methods annotated with @Subscribe are called by geWorkbench when an object of the appropriate type is published. In this case, the method will be called by the engine when another component publishes an object of type ProjectEvent. The second parameter to the method is the publishing compoent itself, although this should rarely be needed. A method annotated with @Subscribe that does not take exactly two parameters will cause an error.
The ProjectEvent is published by the Project Panel. It is published upon the selection of a data set. Almost all components will subscribe to this kind of event.
A project event is handled by introspecting the data set and then acting upon it:
@Subscribe public void receive(ProjectEvent event, Object source) {
    DSDataSet dataSet = event.getDataSet();
    // We will act on this object if it is a DSMicroarraySet
    if (dataSet instanceof DSMicroarraySet) {
        microarraySet = (DSMicroarraySet) dataSet;
        ...
    }
}
In the above case, events for data sets other than DSMicroarraySet are ignored. A subscriber for project events should always check the type of received data sets regardless of what is specified in the @AcceptTypes annotation.
The Details
@Subscribe public void receive(ProjectEvent event, Object source) {
    DSDataSet dataSet = event.getDataSet();
    // We will act on this object if it is a DSMicroarraySet
    if (dataSet instanceof DSMicroarraySet) {
        microarraySet = (DSMicroarraySet) dataSet;
        // We just received a new microarray set,
        // so populate the info label with some basic stats.
        String htmlText = "<html><body>"
            + "<h3>" + microarraySet.getLabel() + "</h3><br>"
            + "<table>"
            + "<tr><td>Arrays:</td><td><b>" + microarraySet.size()
            + "</b></td></tr>"
            + "<tr><td>Markers:</td><td><b>"
            + microarraySet.getMarkers().size()
            + "</b></td></tr>"
            + "</table>"
            + "</body></html>";
        infoLabel.setText(htmlText);
    }
}
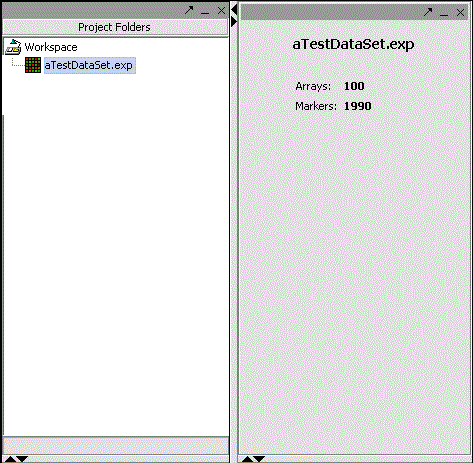
In this code snippet, the number of arrays and markers are extracted and displayed in an HTML label. Note that this is rendered every time a microarray set is selected in the project panel.
Again, the screenshot of the component at work:
Component Resources
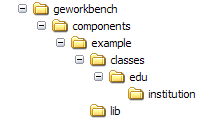
Once one or more related components are written, they are combined in to component resources for deployment to geWorkbench. This is just a simple directory structure, similar to WAR files in web applications.
A directory is created in the components subdirectory. In this case, it is called example. In this directory is a lib folder, which contains jar files that are needed by the component. Note that jar files that are required by the component but are already present in geWorkbench's main lib directory need not be included here, although it does no harm. Also in this directory is a classes directory, which contains the compiled classes for the component as well as any property or resource files required for the component to function.
The geWorkbench engine will instantiate a new classloader for each component. This classloader will resolve classes as follows:
- Component's classes directory.
- Component's lib directory.
- geWorkbench's classloader.
Component resource files can also be packaged up in to GEAR files (geWorkbench Archive) for easy download and deployment. See the section on GEAR files for more information.
Configuration
Configuration of the application is controlled by XML files, including one main xml file and one xml file for each plugin component. The main xml file can be specified as a command-line argument to geWorkbench, or a default XML file will be chosen if none is specified. A schema for this configuration file is available. See geWorkbench/src/org/geworkbench/engine/config for some example configuration files.
A typical configuration directive for the above exmaple component is as follows:
<plugin id="Example" name="Example"
        class="org.geworkbench.components.example.ExampleComponent"
        source="example">
    <gui-area name="VisualArea"/>
</plugin>
- Components are made available to the application via the <plugin> element.
- The id attribute is just a unique identifier for the component.
- The name attribute is the name that appears in the interface (if visual).
- The class attribute is the full class name of the component.
- The source attribute is the resource directory where the component can be found.
- The <gui-area> element is used to define how the component should be displayed. It is for visual components only. In this case, we put the component in to the main visual area of the application.
