GeWorkbench Example
From Informatics
see also: Working Groups, TeraGrid, TeraGrid User Support, CaGrid, CaGrid/TeraGrid/geWorkbench_Integration.
Contents |
Goal
The goals of this initiative are to:
- Submit jobs to TeraGrid via caGrid gateway services. This configuration allows computationally intensive analysis ro run on resources which cater to heavy computation.
- Document best practices on setting up a TeraGrid-Aware caGrid gateway service. (See Deliverables)
- Demonstrate this process using the geWorkbench Hierarchical Clustering analysis component.


Although the new service is TeraGrid-aware, the perspective from geWorkbench does not change. As far as geWorkbench is concerned, it is still connecting to a Hierarchical Clustering caGrid service. The difference is now the caGrid service is a gateway service that submits a TeraGrid job on behalf of geWorkbench. geWorkbench, however, does not notice this difference.
Tools
This section provides links to all the tools we used in this project. It is best to continue reading this wiki to get an idea of how we used these tools before coming back for more information on the tools themselves.
geWorkbench
caGrid
General
Security
- Grid Authentication and Authorization with Reliably Distributed Services (GAARDS)
- Dorian
- Grid Trust Service (GTS)
- Credential Delegation Service (CDS)
- Grid Grouper
- Depoying a secured container:
Communicating with TeraGrid
TeraGrid
General
Logging On
Submitting Jobs
Moving Files
Additional Information
- Grid Resource Allocation and Management
- This is a Globus protocol used for remote job submission and control.
- There is talk of using Condor to submit jobs to TeraGrid. Condor will use the GRAM protocol for this job submission. Condor has support for java jobs.
Setup
This section references the following caGrid services:
- Grid Authentication and Authorization with Reliably Distributed Services (GAARDS)
- Dorian
- Grid Trust Service (GTS)
- Credential Delegation Service (CDS)
- Grid Grouper
You can set up your own Dorian, GTS, CDS, and Grid Grouper services by following the links above. In this wiki, we use the services available on the caGrid training grid.
Security for caGrid-TeraGrid Communication

Before diving into the setup process, bring up the caGrid GAARDS UI:
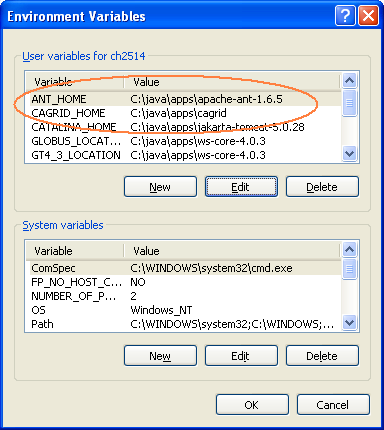
- Go to the directory with caGrid 1.1 installed (we will refer to this directory as CAGRID_HOME, for example C:\java\apps\caGrid). If you don't have caGrid 1.1 installed, please do so.
- Under CAGRID_HOME, type
ant security

![]() Obtain caGrid user account for geWorkbench GUI user
Obtain caGrid user account for geWorkbench GUI user
On the machine that the geWorkbench GUI is expected to be used,

![]() Synchronize user credentials with caGrid Trust Fabric
Synchronize user credentials with caGrid Trust Fabric
On the machine that the geWorkbench GUI is expected to be used, go to CAGRID_HOME, and type
ant -Dtarget.grid=<grid name> configure (Possible grids names are: nci_prod,nci_qa,nci_stage,nci_dev,osu_dev,training,custom_grid.)
to specify the caGrid with which you wish to work. (For more information on configuring caGrids, see how to change target grids.)
Next, go to CAGRID_HOME/projects/syncgts
ant syncWithTrustFabric
For more information on synchronizing with caGrid Trust Fabric, see caGrid Wiki on GTS.
![]() Obtain caGrid host account for geWorkbench dispatcher
Obtain caGrid host account for geWorkbench dispatcher
On the machine that hosts the geWorkbench dispatcher,
![]() Synchronize host credentials with caGrid Trust Fabric
Synchronize host credentials with caGrid Trust Fabric
On the machine that hosts the geWorkbench dispatcher, go to CAGRID_HOME, and type
ant -Dtarget.grid=<grid name> configure (Possible grids names are: nci_prod,nci_qa,nci_stage,nci_dev,osu_dev,training,custom_grid.)
to specify the caGrid with which you wish to work. The target grid should be the same one you used in step 2. (For more information on configuring caGrids, see how to change target grids.)
Next, go to CAGRID_HOME/projects/syncgts
ant syncWithTrustFabric
For more information on synchronizing with caGrid Trust Fabric, see caGrid Wiki on GTS.
![]() Obtain host proxy for geWorkbench dispatcher
Obtain host proxy for geWorkbench dispatcher

![]() Include user ID in the caGrid Grid Grouper
Include user ID in the caGrid Grid Grouper
- Go to the machine running geWorkbench and obtain the user proxy:
Click on "Login" and ask to authenticate with your username and password. Use the appropriate dorian uri, for example, if you obtained your user account on the training grid, get its proxy from the training Dorian. Also set the proxy lifetime to 4 hrs and delegation length to 2. Click "Authenticate".

Note: The 4 hours of proxy lifetime is required to coordinate with the delegation lifetime that is set programmatically in the "Obtaining the Delegation Reference" section.
A "Proxy Manager" dialog pops up --> click on the certificate you just generated listed under "Certificate Chain" --> click on "Set Default"

- Add the user id for geWorkbench user to the grid grouper:

In the GAARDS UI, click on Group Management menu --> Group Browser to bring up the grid grouper UI. Click on "Add Grid Grouper". This brings up the Add Grid Grouper dialog. In the dialog, specify the appropriate grid grouper URL and geWorkbench user credential. Click "Add".

After the grid grouper service loads successfully, go to the service explorer on the left. Choose the grid group for this project, and double click on the group name. This brings up the stem details for that group. Click on the "Members" tab.

Click on "Add Member" at the bottom. This brings up the add member dialog. Choose member type "user" and specify user name in "Member Identity". Click "Add Member".

User name should show up in the members list.
![]() caBIG community account for TeraGrid
caBIG community account for TeraGrid
Developers of gateway services will use the caBIG Community account to access Teragrid resources. They will not have to obtain individual Teragrid accounts but if interested, these steps can be followed:
Verfiy that you have access to the caBIG community account:
Log onto a login node (for example, the San Diego cluster login node)
ssh -X <userNameForSanDiego>@dslogin.sdsc.edu
password:<SanDiegoPassword>
Perform Single Sign On
<userNameForSanDiego>@tg-grid1:~> myproxy-logon -T -l <userNameForUserPortal>
Enter MyProxy pass phrase:<userPortalPassword>
A credential has been received for user <userNameForUserPortal> in /tmp/x509up_u510.
Trust roots have been installed in /home/<userNameForUserPortal>/.globus/certificates/.
<userNameForUserPortal>@tg-grid1:~> grid-proxy-info
subject  : /C=US/O=National Center for Supercomputing Applications/ CN=<Name of User>
issuer   : /C=US/O=National Center for Supercomputing Applications/
OU=Certificate Authorities/CN=MyProxy
identity : /C=US/O=National Center for Supercomputing Applications/ CN=<Name of User>
type     : end entity credential
strength : 1024 bits
path     : /tmp/x509up_u510
timeleft : 11:59:37
<userNameForUserPortal>@tg-grid1:~> gsissh tg-login.ncsa.teragrid.org NCSA Teragrid Cluster (MERCURY) --In Production with 868 nodes--
- For addtional information on available clusters and node, see TeraGrid Resources (Click on "Resources" tab and "Systems Monitor" sub-menu to get a list of host nodes.)
![]() Synchronize caBIG community credentials for TeraGrid with caGrid Trust Fabric
Synchronize caBIG community credentials for TeraGrid with caGrid Trust Fabric
![]() Synchronize caBIG community credentials for TeraGrid with TeraGrid Trust Fabric
Synchronize caBIG community credentials for TeraGrid with TeraGrid Trust Fabric
![]() Associate the appropriate grid group with the gateway service
Associate the appropriate grid group with the gateway service
Assuming the gateway service has been created -- load it into Introduce (via "Modify Service" button) and go to the "Security" Tab. The authorization sub-tab allows you to specify the grid grouper membership that is allowed to access this gateway service. (If the gateway service has not been created, please skip this step and follow instructions under section #Creating the caGrid Gateway Service.)

In the "Authorization" tab, first specify the authorization mechanism to be "Grid Grouper". Then specify the grid grouper service URL and click "Load" to bring up the list of groups available. Click on "TeragridSample" group and then click on "Add Group". That will add the TeragridSample group to the list of authorized users to invoke the gateway service. For more information, see caGrid Grid Grouper.
Binary Staging on TeraGrid
Make sure you have access to the caBIG community account for TeraGrid or some other valid TeraGrid account. If not, see step 7 from the section above.
For illustration purposes, we use the fat jar file for the hierarchical clustering gateway as an example to follow.
- Stage jar files in the community software area. Argonne is a good machine to use. To transfer jar files, log in using the caBIG account, and use scp or ftp to transfer the jar file.
- Make sure the node you plan to stage the binaries on contains the correct version of the software your binaries will need (i.e. does Argonne has JDK 1.5).
- First, create a command line interface and test it out locally. This should take in an input directory to read the serialized objects from and an output directory to serialize the results to. Running this would look like:
java -Xmx900M -jar HierarchicalClusteringCli_fat.jar -i my/input/dir o- my/output/dir
- Next, test your binary (e.g. HierarchicalClusteringCli_fat.jar) on the Argonne cluster.
- Log onto to a login node (e.g. sdsc) as detailed in step 7 from the section above.
- scp your binary (e.g. HierarchicalClusteringCli_fat.jar) to the login machine.
- Perform single sign on as detailed in step 7 from the section above.
- scp your binary (e.g. HierarchicalClusteringCli_fat.jar) from the login machine to your chosen cluster machine (e.g. tg-grid1.uc.teragrid.org).
- Verify that the necessary software is available to you. (For example, to run Run HierarchicalClusteringCli_fat.jar, type java - version to verify that tg-grid1 is running java 1.5.*.)
- Run your binary again. (In case of HierarchicalClusteringCli_fat.jar, run again the java command from above.)
- The log output should be the same as the local run.
Creating the caGrid Gateway Service
This section details how to create a caGrid gateway service. For illustration purposes, we use the code for the hierarchical clustering gateway as an example to follow.
Introduce and gRAVi
Use Introduce with the gRAVi plugin to create the basis for the gateway service -- TeragridSample. The generated code should have the following structure:

In Introduce, the data types imported are:

The specified operations method is:

In this case the one method the gateway client calls is execute().
The security options should be:

with "Custom" option, and all three communications security options checked. (All three communications methods should show "Privacy".
The authorization tab allows you to specify the grid grouper membership that is allowed to access this gateway service.
In the "Authorization" tab, first specify the authorization mechanism to be "Grid Grouper". Then specify the grid grouper service URL and click "Load" to bring up the list of groups available. Click on "TeragridSample" group and then click on "Add Group". That will add the TeragridSample group to the list of authorized users to invoke the gateway service. For more information, see caGrid Grid Grouper.
Under the "Service Credentials" tab, choose to import credentials from the file system and run as the system.

Gateway Client
- org.cagrid.introduce.sample.teragrid.client.TeragridSampleClient.java
The gateway client passes the data, getMicroArraySet(), and the user selected parameters, getHierarchicalClusteringParameter(), to the gateway service hosted at GATEWAY_SERVICE_URL. Both the microarray set and parameters are caDSR compliant data structures geWorkbench uses.
TeragridSampleClient client = new TeragridSampleClient(GATEWAY_SERVICE_URL);
HierarchicalCluster hc = client.execute(getMicroArraySet(), getHierarchicalClusteringParameter());
Gateway Service
- org.cagrid.introduce.sample.teragrid.context.service.TeragridSampleImpl.java
- Make sure the following jars are on the classpath:
GLOBUS_LOCATION/lib/axis.jar
GLOBUS_LOCATION/lib/gram-client.jar
GLOBUS_LOCATION/lib/gram-stubs.jar
GLOBUS_LOCATION/lib/gram-util.jar
GLOBUS_LOCATION/lib/gram-monitoring.jar
GLOBUS_LOCATION/lib/wsrf-core.jar
GLOBUS_LOCATION/lib/cog-jglobus.jar
GLOBUS_LOCATION/lib/jgss.jar
- Import the following classes:
import java.io.File;
import java.io.FileInputStream;
import java.io.FileOutputStream;
import java.io.IOException;
import java.io.ObjectInputStream;
import java.io.ObjectOutputStream;
import java.io.RandomAccessFile;
import java.net.URL;
import java.rmi.RemoteException;
import java.util.Date;
import org.apache.axis.components.uuid.UUIDGen;
import org.apache.axis.components.uuid.UUIDGenFactory;
import org.apache.axis.message.addressing.EndpointReferenceType;
import org.globus.exec.client.GramJob;
import org.globus.exec.generated.JobDescriptionType;
import org.globus.exec.generated.StateEnumeration;
import org.globus.exec.utils.ManagedJobFactoryConstants;
import org.globus.exec.utils.client.ManagedJobFactoryClientHelper;
import org.globus.wsrf.impl.security.authentication.Constants;
import org.globus.wsrf.impl.security.authorization.Authorization;
import org.globus.wsrf.impl.security.authorization.HostAuthorization;
import org.gridforum.jgss.ExtendedGSSCredential;
import org.gridforum.jgss.ExtendedGSSManager;
import org.ietf.jgss.GSSCredential;
import org.globus.exec.client.GramJobListener;
import org.globus.ftp.DataChannelAuthentication;
import org.globus.ftp.DataSink;
import org.globus.ftp.DataSource;
import org.globus.ftp.FileRandomIO;
import org.globus.ftp.GridFTPClient;
import org.globus.ftp.GridFTPSession;
import org.globus.gsi.GlobusCredential;
import org.globus.gsi.GlobusCredentialException;
import org.globus.gsi.gssapi.GlobusGSSCredentialImpl;
- Make sure the class implements GramJobListener interface.
public class TeragridSampleImpl extends TeragridSampleImplBase implements GramJobListener {
This interface has one method:
public void stateChanged(GramJob job) {
StateEnumeration jobState = job.getState();
boolean holding = job.isHolding();
printMessage("========== State Notification ==========");
printJobState(jobState, holding);
printMessage("========================================");
synchronized (this) {
if ( jobState.equals(StateEnumeration.Done)|| jobState.equals(StateEnumeration.Failed)) {
printMessage("Exit Code: " + Integer.toString(job.getExitCode()));
// also call code to start processing results, for example gridFTP them from TeraGrid back to gateway service
this.jobCompleted = true;
}
notifyAll();
}
}
- Authenticate with TeraGrid using caBIG community credentials
GlobusCredential globusCred = new GlobusCredential(PROXY_LOCATION);
GlobusGSSCredentialImpl cred = new GlobusGSSCredentialImpl(globusCred, GSSCredential.INITIATE_AND_ACCEPT);
where PROXY_LOCATION is the location of the TeraGrid user certificate.
- set up gridFTP info
String DEST_HOST = <name of the host in TeraGrid with the gridFTP service>
int GRIDFTP_PORT = 2811;
- gridFTP input data and parameters
String FILE_TO_FTP = <full path to the input data file/parameter file>;
GridFTPClient client = new GridFTPClient(DEST_HOST, GRIDFTP_PORT);
client.authenticate(creds);
client.setProtectionBufferSize(16384);
client.setType(GridFTPSession.TYPE_IMAGE);
client.setMode(GridFTPSession.MODE_EBLOCK);
client.setDataChannelAuthentication(DataChannelAuthentication.NONE);
client.setDataChannelProtection(GridFTPSession.PROTECTION_SAFE);
client.setPassive();
client.setLocalActive();
DataSource source = new FileRandomIO(new RandomAccessFile(new File(FILE_TO_FTP), "r"));
client.extendedPut(FILE_TO_FTP, source, null);
client.close();
- Submitting the TeraGrid job (also see TeraGrid wiki on submitting GRAM jobs via Java).
Break up the original command line to invoke the staged hierarchical clustering jar
java -Xmx900M -jar HierarchicalClusteringCli_fat.jar -i my/input/dir o- my/output/dir
to
String [] arguments = new String [7];
arguments [0] = "-Xmx900M";
arguments [1] = "-jar";
arguments [2] = "<gateway_bin>/HierarchicalClusteringCli_fat.jar";
arguments [3] = "-i";
arguments [4] = "<gateway_input_directory>";
arguments [5] = "-o";
arguments [6] = "<gateway_output_directory>";
Allow delegeation from client -> gRAVi service -> GRAM
boolean limitedDelegation = true;
boolean delegationEnabled = true;
Set service dates
Date serviceDuration = <set service duration>
Date serviceTermination= <set service termination date>
Submit the job
JobDescriptionType jobDescription = createJobDescription(PATH_TO_JAVA_BIN + "/java", arguments);
GramJob job = new GramJob(jobDescription);
job.setTimeOut(GramJob.DEFAULT_TIMEOUT);
job.setAuthorization(HostAuthorization.getInstance());
job.setMessageProtectionType(Constants.ENCRYPTION);
job.setDelegationEnabled(delegationEnabled);
job.setDuration(serviceDuration);
job.setTerminationTime(serviceTermination);
// GRAMContact and GRAMType are both specified in rave.properties
EndpointReferenceType factoryEndpoint = getFactoryEPR(GRAMContact, GRAMType);
ExtendedGSSManager manager = (ExtendedGSSManager) ExtendedGSSManager.getInstance();
// proxyPath is specified in rave.properties
String handle = "X509_USER_PROXY=" + proxyPath.toString();
GSSCredential proxy = manager.createCredential(handle.getBytes(), ExtendedGSSCredential.IMPEXP_MECH_SPECIFIC, GSSCredential.DEFAULT_LIFETIME, null, GSSCredential.INITIATE_AND_ACCEPT);
job.setCredentials(proxy);
String submissionID = "uuid:" + uuidgen.nextUUID();
job.addListener(this);
job.submit(factoryEndpoint, false, limitedDelegation, submissionID);
Note: for details on rave.properties, see wiki on gRAVi pluging.
- gridFTP to retrieve results
String FILE_TO_FTP = <full path to the result data file>;
GridFTPClient client = new GridFTPClient(DEST_HOST, GRIDFTP_PORT);
client.authenticate(cred);
client.setProtectionBufferSize(16384);
client.setType(GridFTPSession.TYPE_IMAGE);
client.setMode(GridFTPSession.MODE_EBLOCK);
client.setDataChannelAuthentication(DataChannelAuthentication.SELF);
client.setDataChannelProtection(GridFTPSession.PROTECTION_SAFE);
client.setLocalPassive();
client.setActive();
DataSink sink = new FileRandomIO(new RandomAccessFile(new File(FILE_TO_FTP), "rw"));
client.get(FILE_TO_FTP, sink, null);
client.close();
Deploying the Gateway Service
- A gateway services must be deployed in a secured caGrid container. You can either configure tomcat to be a secured container or install globus as the secured container.
- If you intend to connect your component to this gateway service from geWorkbench, you would also need to register the gateway service with an index service geWorkbench can reach. In Introduce's Deploy dialog, be sure to set "perform.index.service.registration" to be true, and specify the appropriate index service URL in "index.service.url" before clicking "Deploy".

- If you are not using geWorkbench, you can skip the index service registration and click "Deploy". Then simply use the URL to the gateway service when you instantiate your gateway client. (See #Gateway Client).
caGrid-TeraGrid Security
Before continuing through this section, be sure that you have already performed the one-time security setups for both caGrid and TeraGrid. If not, please see #Security for caGrid-TeraGrid Communication.
This section references the following caGrid services:
- Grid Authentication and Authorization with Reliably Distributed Services (GAARDS)
- Dorian
- Grid Trust Service (GTS)
- Credential Delegation Service (CDS)
- Grid Grouper
Again, the geWorkbench Hierarchical Clustering example uses these services on caGrid's training grid.
Runtime Security Flow

Delegating caGrid Proxy
With caGrid 1.2, an entity that successfully obtains a grid proxy can delegate the actual execution request to another entity. (In our case, we would be getting the grid proxy with the machine running geWorkbench and delegating the grid execution request to our dispatcher service.)
While we are still working with caGrid 1.1, we can download the delegation service jars. A good place to put the cds-client folder is under CAGRID_HOME/projects/.
![]() (Steps 1 through 6 is done before the #Gateway Client invokes the #Gateway Service.)
(Steps 1 through 6 is done before the #Gateway Client invokes the #Gateway Service.)
Obtaining the user certificate
Geworkbench stores the user’s grid proxy generated from #1 locally. There are two approaches for getting the certificate: #Get the certificate manually and then programmatically delegate or #Programmatically getting both the certificate and delegate. Choose the option that is appropriate.
Get the certificate manually and then programmatically delegate
Bring up the GAARDS UI (CAGRID_HOME/ant security or with geWorkbench by following the step above)
Click on "Login" and ask to authenticate with your username and password. For our purposes, use the training dorian uri, as specified in the following image. Also set the proxy lifetime to 4 hrs and delegation length to 2. Click "Authenticate".
Note: The 4 hours of proxy lifetime is required to coordinate with the delegation lifetime that is set programmatically in the "Obtaining the Delegation Reference" section.
A "Proxy Manager" dialog pops up --> click on the certificate you just generated listed under "Certificate Chain" --> click on "Set Default"
To access the manually created default certificate in geWorkbench or in any java program,
Put the following jars on the classpath:
CAGRID_HOME/projects/dorian/ext/lib/caGrid-1.1-core.jar
GLOBUS_LOCATION/lib/cog-jglobus.jar
import org.globus.gsi.GlobusCredential;
import org.cagrid.gaards.cds.common.core.ProxyUtil;
GlobusCredential proxy = ProxyUtil.getDefaultProxy();
If you print out your certificate info, it should look like
2007-12-20 10:02:40,685 INFO [edu.columbia.geworkbench.cagrid.security.SecurityTest] - Testing authentication against:    https://dorian.cagrid.org:6443/wsrf/services/cagrid/Dorian
2007-12-20 10:02:41,622 WARN [org.apache.axis.utils.JavaUtils] - Unable to find required classes (javax.activation.DataHandler and javax.mail.internet.MimeMultipart).  Attachment support is disabled.
2007-12-20 10:02:46,169 INFO [edu.columbia.geworkbench.cagrid.security.SecurityTest] - id: _7fca807b473d9f235c5575fe07e37fe6
2007-12-20 10:02:46,169 INFO [edu.columbia.geworkbench.cagrid.security.SecurityTest] - issuer: O=caBIG,OU=caGrid,OU=Training,CN=Dorian IdP Authentication Asserter
2007-12-20 10:02:46,185 INFO [edu.columbia.geworkbench.cagrid.security.SecurityTest] - cert type: sun.security.x509.X509CertImpl
2007-12-20 10:02:46,201 INFO [edu.columbia.geworkbench.cagrid.security.SecurityTest] - cert: [
[
 Version: V3
 Subject: CN=Dorian IdP Authentication Asserter, OU=Training, OU=caGrid, O=caBIG
 Signature Algorithm: SHA1withRSA, OID = 1.2.840.113549.1.1.5
...
Programmatically getting both the certificate and delegate
Put the following jars on the classpath:
CAGRID_HOME/projects/dorian/ext/lib/caGrid-1.1-authentication-service-stubs.jar
CAGRID_HOME/projects/dorian/ext/lib/caGrid-1.1-authentication-service-client.jar
CAGRID_HOME/projects/dorian/build/lib/caGrid-1.1-dorian-client.jar
CAGRID_HOME/projects/dorian/ext/lib/caGrid-1.1-opensaml-1.1.jar
GLOBUS_LOCATION/lib/cog-jglobus.jar
import gov.nih.nci.cagrid.authentication.bean.BasicAuthenticationCredential;
import gov.nih.nci.cagrid.authentication.bean.Credential;
import gov.nih.nci.cagrid.authentication.client.AuthenticationClient;
import gov.nih.nci.cagrid.dorian.client.IFSUserClient;
import gov.nih.nci.cagrid.opensaml.SAMLAssertion;
import org.globus.gsi.GlobusCredential;
BasicAuthenticationCredential userPass = new BasicAuthenticationCredential(password, username);
Credential credential = new Credential();
credential.setBasicAuthenticationCredential(userPass);
AuthenticationClient authenticationClient = new AuthenticationClient(dorianUri, credential);
SAMLAssertion samlAssertion = authenticationClient.authenticate();
assertNotNull(samlAssertion);
gov.nih.nci.cagrid.dorian.ifs.bean.ProxyLifetime lifetime = new gov.nih.nci.cagrid.dorian.ifs.bean.ProxyLifetime();
lifetime.setHours(4);
lifetime.setMinutes(0);
lifetime.setSeconds(0);
IFSUserClient dorian = new IFSUserClient(dorianUri);
GlobusCredential proxy = dorian.createProxy(samlAssertion, lifetime, 2);
Note: There are various ProxyLifetime classes in different caGrid jar files. It is best to use fully qualified name for this class.
![]()
Obtaining the Delegation Reference
Geworkbench uses the default proxy to contact the delegation service, and delegate the credentials to the dispatcher service (will return a delegationreference).
Put the following jars on the classpath:
CAGRID_HOME/projects/cds-client/ext/lib/caGrid-1.2M1-cds-client.jar
CAGRID_HOME/projects/cds-client/ext/lib/caGrid-1.2M1-cds-common.jar
CAGRID_HOME/projects/cds-client/ext/lib/caGrid-1.2M1-cds-stubs.jar
GLOBUS_LOCATION/lib/cog-jglobus.jar
import org.cagrid.gaards.cds.client.ClientConstants;
import org.cagrid.gaards.cds.client.DelegationUserClient;
import org.cagrid.gaards.cds.common.IdentityDelegationPolicy;
import org.cagrid.gaards.cds.common.Utils;
import org.cagrid.gaards.cds.delegated.stubs.types.DelegatedCredentialReference;
import org.globus.gsi.GlobusCredential;
// Specify which host machine to delegate the user credentials.
// This is usually in the form of...
String party = "/O=caBIG/OU=caGrid/OU=Training/OU=Services/CN=host/<host name>";
// Specifies the path length of the credential being delegate the minumum is 1.
int delegationPathLength = 1;
// Specifies the how long credentials issued to allowed parties will be valid for.
org.cagrid.gaards.cds.common.ProxyLifetime issuedCredentialLifetime = new org.cagrid.gaards.cds.common.ProxyLifetime();
issuedCredentialLifetime.setHours(4);
issuedCredentialLifetime.setMinutes(0);
issuedCredentialLifetime.setSeconds(0);
// Specifies how long the delegation service can delegated this credential to other parties.
org.cagrid.gaards.cds.common.ProxyLifetime delegationLifetime = new org.cagrid.gaards.cds.common.ProxyLifetime();
delegationLifetime.setHours(1);
delegationLifetime.setMinutes(0);
delegationLifetime.setSeconds(0);
// Specifies the path length of the credentials issued to allowed parties. A path length of 0 means that the requesting party cannot further delegate the credential.
int issuedCredentialPathLength = 0;
// Specifies the key length of the delegated credential
int keySize = ClientConstants.DEFAULT_KEY_SIZE;
// The policy stating which parties will be allowed to obtain a delegated credential. The CDS will only issue credentials to parties listed in this policy.
List<String> parties = new ArrayList<String>();
parties.add(party);
IdentityDelegationPolicy policy = Utils.createIdentityDelegationPolicy(parties);
// Create an instance of the delegation client, specifies the CDS Service URL and the credential to be delegated.
DelegationUserClient client1 = new DelegationUserClient(cdsURL, proxy);
// Delegates the credential and returns a reference which can later be used by allowed parties to obtain a credential.
DelegatedCredentialReference delegatedCredentialReference = client1.delegateCredential(delegationLifetime, delegationPathLength, policy,issuedCredentialLifetime, issuedCredentialPathLength, keySize);
Note:
- There are various ProxyLifetime classes in different caGrid jar files. It is best to use fully qualified name for this class.
- The variable "proxy" is defined in the previous section, "obtaining the user certificate".
Delegate to Another Service
Put the following jars on the classpath:
CAGRID_HOME/projects/cds-client/ext/lib/caGrid-1.2M1-cds-client.jar
CAGRID_HOME/projects/cds-client/ext/lib/caGrid-1.2M1-cds-common.jar
CAGRID_HOME/projects/cds-client/ext/lib/caGrid-1.2M1-cds-stubs.jar
GLOBUS_LOCATION/lib/cog-jglobus.jar
import org.cagrid.gaards.cds.client.ClientConstants;
import org.cagrid.gaards.cds.client.DelegationUserClient;
import org.cagrid.gaards.cds.common.IdentityDelegationPolicy;
import org.cagrid.gaards.cds.common.Utils;
import org.cagrid.gaards.cds.delegated.stubs.types.DelegatedCredentialReference;
import org.globus.gsi.GlobusCredential;
As an example, geWorkbench GUI delegates the delegatedCredentialReference to the geWorkbench dispatcher service.
![]()
Pass along "DelegatedCredentialReference delegatedCredentialReference" from above to the process running the #Gateway Client. In case of geWorkbench, the GUI must pass this "ref" to the dispatcher service.
dispatcherClient.submit(..., delegatedCredentialReference);
![]()
The machine hosting the service running the gateway client (in this case the dispatcher service called upon in the previous step) on behalf of the user (in this case geWorkbench GUI) should load its own certificates first before asking for the delegated certificate.
//Service certificate file
File certFile = new File(pathToHostCertificate);
File keyFile = new File(pathToHostKey);
//Load Dispatcher service’s certificate
X509Certificate cert = CertUtil.loadCertificate(certFile);
//Load Dispatcher service’s private key
PrivateKey key = KeyUtil.loadPrivateKey(keyFile, null);
X509Certificate[] chain = new X509Certificate[]{cert};
//Create Credential for dispatcher service
GlobusCredential credential = new GlobusCredential(key,chain);
![]()
Using the service host's own credentials as well as the delegated credential reference the service received (e.g. the dispatcher service would have its own proxy and the delegatedCredentialReference passed from the dispatcher client), contact the Credential Delegation Service (CDS) for the delegation certificate.
//Create and Instance of the delegate credential client, specifying the
//DelegatedCredentialReference and the credential of the delegatee.  The
//DelegatedCredentialReference specifies which credential to obtain.  The
//delegatee's credential is required to authenticate with the CDS such
//that the CDS may determing if the the delegatee has been granted access
//to the credential in which they wish to obtain.
DelegatedCredentialUserClient client = new DelegatedCredentialUserClient(delegatedCredentialReference, credential);
//The get credential method obtains a signed delegated credential from the CDS.
GlobusCredential delegatedCredential = client.getDelegatedCredential();
The result should be:

![]()
Set the delegated credential as the default proxy for the machine running the #Gateway Client. When the #Gateway Service is in turn invoked, the delegated credential is automatically checked against the grid grouper service. (See step 7.)
ProxyUtil.saveProxyAsDefault(delegatedCredential);
TeraGrid Security
![]()
As long as #Introduce and gRAVi step was performed appropriately (specifically in Introduce's "Modify Service" --> Security --> Authorization tab), this step is automatic when the gateway client invokes the gateway service.
![]()
As long as #Gateway Service includes code to authenticate either the caBIG community account or some other valid TeraGrid account, this step is automatic when the gateway service is invoked.
![]()
As long as #Gateway Service includes code to obtain proxy after authenticate with TeraGrid, this step is automatic when the gateway service is invoked.
Running the geWorkbench-caGrid-TeraGrid Demo

Setting Up
- If caGrid is not installed, please do so .
- Download geWorkbench demo source. Follow instructions on the geWorkbench getting started page.
- Make sure to follow instructions in the #Setup section.
- Specify the home directories of Ant and caGrid.

Note: After setting the environmental variables, you must restart the process used to run geworkbench (ie. the console, eclipse, etc.).
Bringing Up Hierarchical Clustering in geWorkbench

Right click on "Workspace" --> "New Project".

Right click on "Project" --> "Open File(s)".

Choose a .exp file.

Click "Don't show this again" and click "Continue".

Click "Cancel" on the annotation dialog.

When the data file loads, clicking on "Hierarchical Clustering" will display its analysis component.
Accessing caGrid Authentication
From geWorkbench, the user can click on the "caGrid Authentication" button to bring up the GAARDS UI.

The GAARDS UI will take a second or two to come up.
Then you can invoke your desired Dorian function. 
Assuming that the user has a valid caGrid account, click on "Login" and ask to authenticate with caGrid username and password. Use the training dorian URL, as specified in the following image. Also set the proxy lifetime to 4 hrs and delegation length to 2. Click "Authenticate".
A "Proxy Manager" dialog pops up --> click on the certificate you just generated listed under "Certificate Chain" --> click on "Set Default"
Running the TeraGrid-Aware Analysis

Click on "Service" tab --> Click on "Grid" radio button --> Click on "Change Index Service". A dialog will allow the user to specify the host and port of the index service. Click on "Grid Services" to find the appropriate hierarchical clustering services registered.

Click on the radio button designating the desired grid service. Click on the "Parameters" tab to go back to the main analysis panel.

Click on project folder, specify the hierarchical clustering analysis parameters and click "Analyze". Wait for the analysis to complete.
