GeWorkbench-web/Overview
|
Home | Overview | Set View | File Formats | Desktop Tutorials |
ANOVA | ARACNe | Cellular Networks KnowledgeBase | Gene Ontology | Hierarchical Clustering | MarkUs | msViper | T-Test |
Introduction to geWorkbench-web
The web and desktop versions of geWorkbench share several basic elements of structure. All data and results are organized in "Workspaces". There can be more than one Workspace, though only one is visible at any one time. Secondly, the "Set View" contains lists of markers (probesets or genes) and microarrays. Just as there can be multiple Workspaces, there can also be multiple marker and array "contexts" within a single Workspace, which can serve to organize the markers and arrays in different ways. Any number of sets of markers and arrays can be defined in each such context.
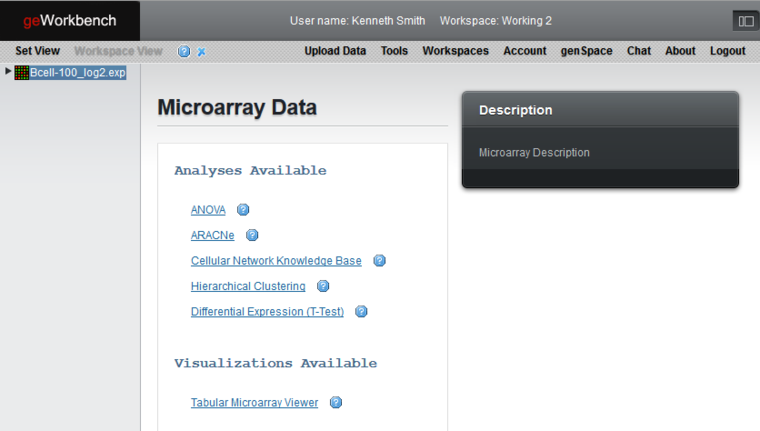
The picture below shows the geWorkbench-web graphical user interface. You can switch between Workspace View and Set View using the top menu items. In this picture, the Workspace View is active and hence its menu item is disabled, whereas the "Set View" menu item is enabled to allow switching to that view.
A single dataset has been loaded, "Bcell-100_log2.exp". This is a microarray gene expression dataset. Under the heading "Microarray Data", all the analyses and visualizations available for the microarray data type are shown. This pattern is followed in general; geWorkbench will always show the particular analyses and visualizations applicable to the currently selected data or result node.
Clicking on an analysis or visualization link will load the desired tool.
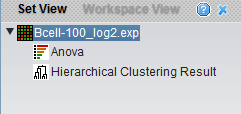
The results of analyses are placed as child nodes of their parent dataset. Here, two analyses have been carried out, an ANOVA run and hierarchical clustering. In turn, clicking on a result node will activate its specific viewer.
See the GeWorkbench-web Set View page for description of that view.
Main Menu Items
- Set View - See the geWorkbench-web Set View for details on working with sets of markers and arrays.
- Workspace View - depicted above, shows loaded datasets and result nodes.
- (?) - Show Annotations - Show the settings for any selected analysis in a pane at the bottom of the web page.
- (x) - Delete selected data node - Remove a data or result node from the database
- Upload Data - (See entry below) Upload a gene expression or PDB strucure file.
- Tools - Show a complete list of all analyses and visualizations
- Workspaces
- Create - Create a new workspace
- Switch - Switch to a different workspace - a list of available workspaces is shown
- Delete - Delete a workspace - a list of all workspaces is shown
- Account - Edit account details
- genSpace - genSpace is the social media component of geWorkbench
- Chat - Chat with a genSpace friend
- About - Details of the current version of geWorkbench-web
- Logout - End your geWorkbench session
Upload Data
geWorkbench-web can upload two types of data
- Gene expression data matrix files.
- PDB molecular structure files.
Gene expression data matrix files are tab-delimited and contain markers (probesets) in rows and samples (arrays) in the columns. Two related formats are supported:
- Expression File (.exp) - This is the geWorkbench-specific file format for data matrix. It can be created by geWorkbench-desktop, or through minor edits of a tab-delimited data file. This format supports assigning arrays to sets.
- Tab-delimited format file - standard tab-delimited format.
PDB files provide 3D molecular structures for macromolecules.
- PDB File - for standard PDB format files.
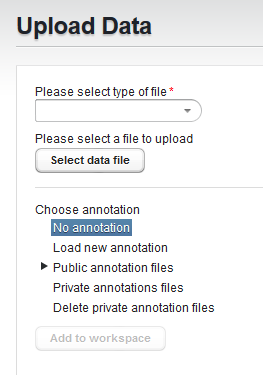
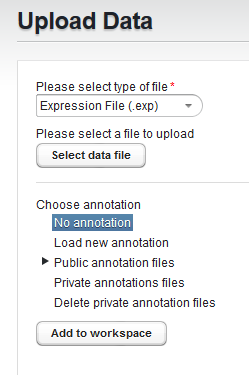
- Click the "Upload" menu time to bring up the "Upload Data" dialog
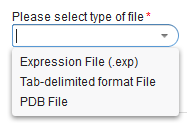
and select the desired file type.
Here, we selected the "Expression File (.exp) format.
Then click "Select data file" to choose the file to upload.
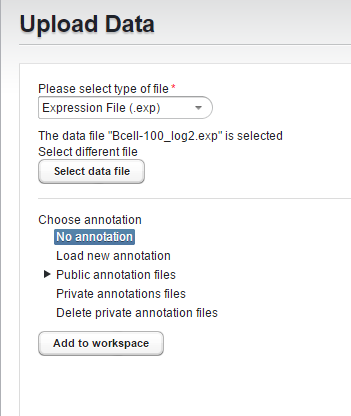
The chosen file will be displayed in the dialog.
For the two gene expression format files, the next step is to associate an annotation file if desired (Affymetrix only)
The choices are:
- No annotation
- Load new annotation
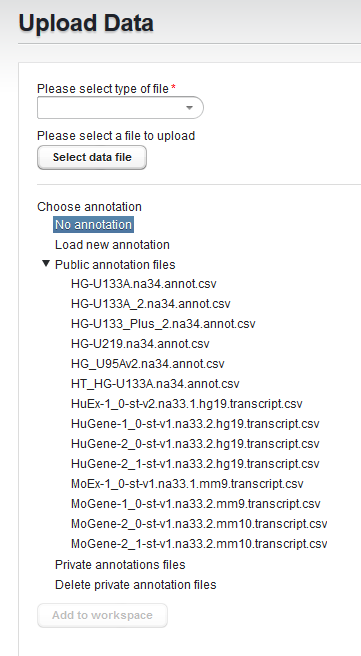
- Public annotation files - the public folder contains a number of pre-loaded current Affymetrix annotation files.
- Private annotation files - upload your own copy of an annotation file which will be stored for your own future use.
- Delete private annotation files - delete a private annotation file you previously uploaded.
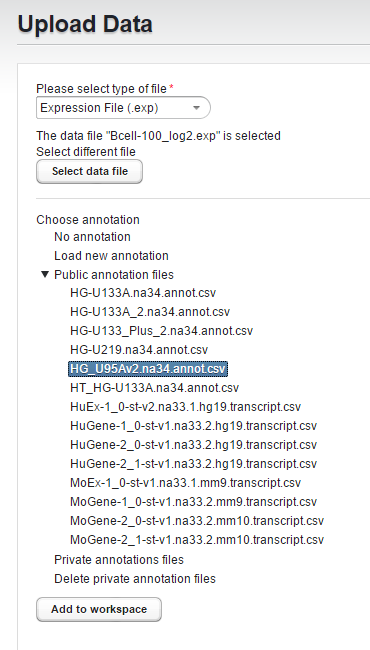
Here the public copy of the HG_U95Av2 annotation file for the Bcell-100 dataset is selected.
Press "Add to Workspace" to complete the upload process. The dataset will be placed into the Workspace.
Delete
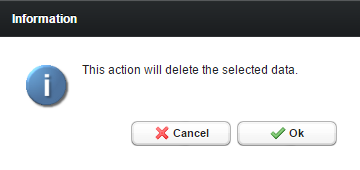
A data or result node can be deleted by selecting it in the Workspace View and clicking on the "x" icon on the main menu.
