Menu Bar
Introduction
The Menu Bar is located at the top of the geWorkbench graphical interface, and provides access to important actions, settings and information.
This section will briefly cover the individual menu items. Some items have their own more extensive documentation, and links to this will be provided.
The first two items in the menu, "File" and "Edit", apply to the Workspace, described in the next section.
Background on the Workspace
The Workspace is used for data organization and management. It arranges data nodes and the results of analysis on the data in a hierarchical fashion.
- Workspace - A Workspace contains all the data for a geWorkbench session. Only one Workspace can be present at a time. A Workspace can be saved and reloaded.
- Data nodes - These contain data either loaded from files on disk or retrieved from the network.
- Result nodes - After an analysis is done in geWorkbench, a result node is created as a child of the data node from which it was created.
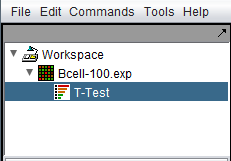
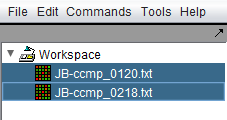
The following diagram shows the Workspace with a single data node and its child t-test analysis result node.
File
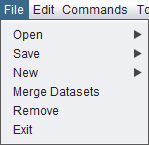
The following choices are available under the File menu.
Open
All options for opening files are explained in the sections Local_Data_Files and Remote_Data_Sources.
- File - Open a specific data file from disk. A standard file browser will appear, and the user can select from any of the file types that geWorkbench can directly load.
- Note - The Open File action is also available by right-clicking on the Workspace node.
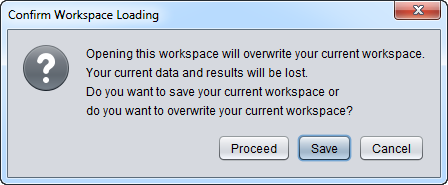
- Workspace - Open a previously saved geWorkbench Workspace. A standard file browser will appear with which to locate the desired Workspace file. As shown in the figure below, a dialog will appear warning the user that the current Workspace will be overwritten. The user is offered the option to save the current Workspace before proceeding.
Save
- Workspace - Save the current geWorkbench Workspace to a file on disk. All data and result nodes will be saved.
- Dataset - Save the currently selected data node. This is implemented for the following data types:
- Microarray gene expression - data is saved using the geWorkbench ".exp" format, regardless of the original format. This allows saving e.g. a merged dataset, and/or any array and marker sets that may have been created.
- FASTA - saved in FASTA format (.fasta).
- PDB - saved in PDB format (.pdb).
- Network - saved using the Adjacency Matrix "ADJ" format (.adj).
Note - an additional option to export an expression file to a tab-delimited format is available by right-clicking directly on the expression data node.
New
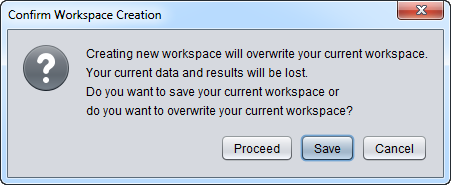
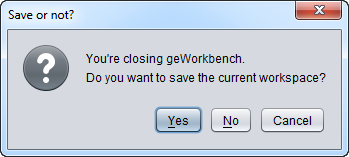
- Workspace - Create a new Workspace. Doing so will destroy the existing Workspace, so the user will be prompted as to whether to save the current Workspace. This is shown in the diagram below.
Merge Datasets
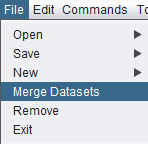
If more than one microarray expression data file or data set originating from the same platform has been loaded into the Workspace, they can be merged into one for analysis. Highlight the microarrays/datasets to be merged, then select "Merge Datasets". The microarray data nodes to be merged must all be from the same platform (chip type).
Requirements for merging microarray data files or data sets:
- Markers - each file or dataset to be merged must contain exactly the same list of markers.
- Arrays - no array name can be repeated more than once.
If either condition above is not met, a warning pop-up will appear and the merge will be terminated.
Merging is not supported for other file types such as PDB, Fasta etc.
Example: Merging microarray data nodes
1. In the Workspace, select the microarray data nodes that you want to merge.
2. Click on File in the menu bar, and choose Merge Datasets.
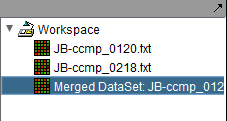
3. The result is a new data node containing the merged data. The original data nodes are still present.
Remove
This option will remove one or more selected data nodes from the Workspace. (Multiple selection is supported). It will not remove the Workspace node itself.
Exit
Close geWorkbench. The user will be prompted as to whether to save the Workspace before closing.
Edit
Rename
- File - Rename the currently selected data or result node.
Commands
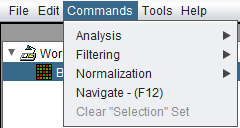
The first three entries, "Analysis", "Filtering", and "Normalization" are context sensitive. They will display the components of each type available for the data node type currently selected in the Workspace. Only components which have been loaded in the Component Configuration Manager will be displayed.
The following choices are available under the "Commands" menu:
- Analysis -> show currently loaded analysis components
- Filtering -> show currently loaded filtering components
- Normalization -> show currently loaded normalization components
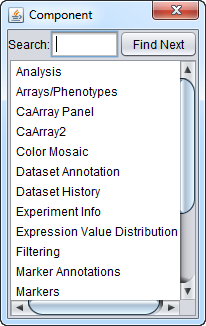
- Navigation - (F12) - Clicking on "Navigate" in the menu, or hitting the "F12" key, will pop up a menu listing all windows open in geWorkbench. Double-clicking on an entry in the list will display that window (if it was previously hidden) and make it the active input window. Windows also can be searched for by name in the "Search" field at top.
- Clear "Selection" Set - Clears the contents of the default "Selection" set in either the Markers or the Arrays component (whichever is currently visible).
The figure below shows the Navigation menu.
Tools
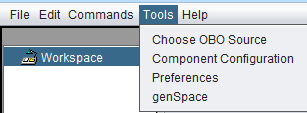
Choose OBO Source
By default, each time geWorkbench starts, it downloads the latest Gene Ontology OBO file from the geneontology.org download site, and then loads this file for use by its components (e.g. GO Viewer, GO Analysis, CNKB). However, the "Choose OBO Source" entry in the Tools menu allows a local file to be chosen instead.
The file of type go-basic.obo is downloaded. Only this format file can be used in geWorkbench.
If the OBO Source setting is changed in either direction between remote and local, geWorkbench must be restarted before the change will take effect.
If the remote gene ontology OBO file cannot be downloaded, a default local copy is used instead.
In addition, the user can elect to use a local OBO file rather than using the remote copy. The local OBO file to be used can be chosen.
Remote OBO file (default)
Use the OBO file downloaded from geneontology.org.
- Note - if the remote OBO file cannot be downloaded from the www.geneontology.org site, a copy of the file which is included with the geWorkbench installation will be used instead. It is located in the geWorkbench data subdirectory.
Local OBO file
A file browser allows the user to specify any desired local copy of the OBO file. After the setting has been changed, geWorkbench must be restarted before the change will take effect.
Component Configuration
geWorkbench has a large selection of components applicable to many different areas of biological data analysis. A particular investigator may wish to load only the components needed for his or her own analysis.
The Component Configuration Manager allows individual geWorkbench components to be loaded or unloaded. Full details on its use are available in the Component Configuration Manager tutorial chapter.
Preferences
Please see the Preferences section for a description of features that can be configured in geWorkbench. These include the default text editor, color schemes for heat maps, GenePix expression calculation methods, and the remote component repository URL.
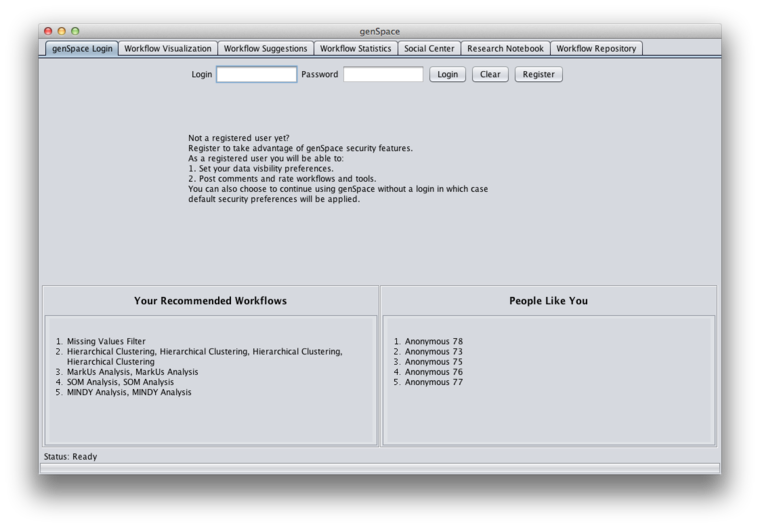
genSpace
Please see the genSpace tutorial for further information.
Help
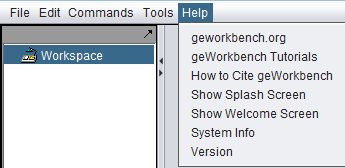
geworkbench.org
The geWorkbench project home page.
geWorkbench Tutorials
Full documentation and examples for each component of geWorkbench.
How to Cite geWorkbench
Instructions for citing geWorkbench in publications.
Show Splash Screen
Displays the geWorkbench startup splash screen with developer credits.
Show Welcome Screen
The Wecome Screen is displayed the first time a new version of geWorkbench is run on a computer. It displays introductory information about how to learn about using geWorkbench. It may also provide version-specific notices.
- The Welcome Screen is dismissed by pushing its "Hide" button.
- The Welcome Screen can be recalled at any time by selecting "Show Welcome Screen" under the main menu bar Help entry.
- The Welcome screen remembers whether is was being displayed or not last time geWorkbench was closed, and will be in the same state when geWorkbench is next run.
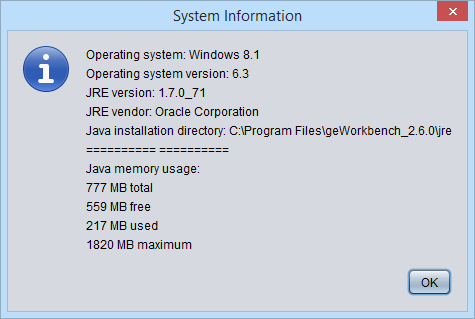
System Info
Displays information about the operating system, the Java version and Java memory usage.
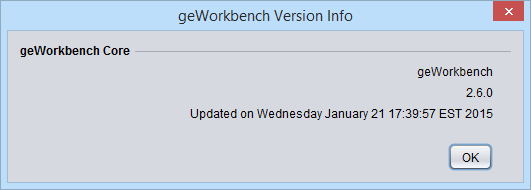
Version Info
Displays the version number of the currently running copy of geWorkbench. It also displays the date on which that version was created.
