Difference between revisions of "Workspace"
(→Project Menu Options) |
(→Removing a project) |
||
| Line 74: | Line 74: | ||
| − | === | + | ===Remove=== |
Selecting '''Remove''' will remove the project and all of its data nodes. | Selecting '''Remove''' will remove the project and all of its data nodes. | ||
Revision as of 19:17, 11 March 2011
Contents
Outline
In this tutorial, you will learn how to:
- Create a new Project.
- Rename a project and/or project node.
- Remove a project and/or project node.
- Save project files that you have created.
Workspaces and Projects
In the Project Folders component there is a top-level object called a workspace.
The workspace can contain one or more separate projects, and each project can contain opened data files and analysis results. An analogy might be that a workspace is like a drawer in a filing cabinet, and projects are individual folders in that drawer. Projects allow data to be grouped, for example by experiment. A project can contain many different types of data, for example microarray data, FASTA sequence files and graphical images. The workspace as a whole, with all its projects and data nodes, can be saved and restored. However, only one workspace can be open at one time.
All data must belong to a project.
Creating a new project
There are two ways to create a new project. First, select the Workspace node in the Project Folders component. Then, either
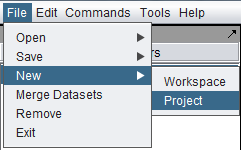
(1) In the top-level Menu, select File->New->Project.
or,
(2) In the Project Folders component, right-click on the Workspace and select "New Project".
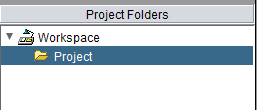
Either way, the new Project is placed into the workspace:
Project Menu Options
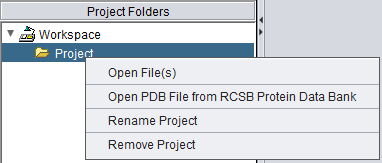
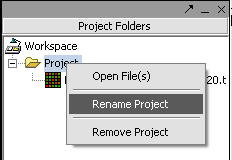
Right-clicking on a Project node gives a menu with the following options
Open Files
- Loading data from local files is covered in the chapter Local Data Files
- Retrieving data from remote sources (caArray) is covered in Remote Data Sources
Open PDB File from RCSB Protein Data Bank
If Open PDB File from RCSB Protein Data Bank is chosen, a dialog box appears.
Type in the name of a PDB structure entry and it will be retrieved from the RCSB Protein Data Bank and loaded into geWorkbench.
Rename
A dialog box will appear in which to enter a new name for the project.
Remove
Selecting Remove will remove the project and all of its data nodes.
Project Data Node Menu Options
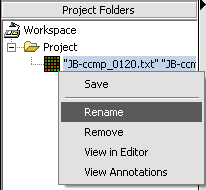
Renaming a data node
1. Right-click on a Project Folder data node.
2. Select Rename.
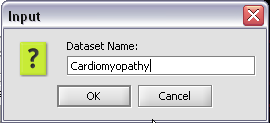
3. In the pop-up screen rename your data node.
4. Click on the OK button.
Removing a project data node
1. Right-click on the data node.
2. Select Remove.
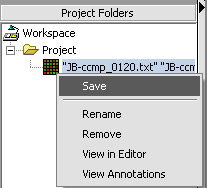
Saving a data node to a file
It is here that, among other things, you can create the matrix multi-experiment file format used by geWorkbench from a merged dataset.
1. Right-click on data node that you want to save.
2. Click Save.
A standard file Save screen will come up.
3. Choose a location.
4. Enter a name.
5. Click on the Save button.

