Workspace
Contents
Outline
In this tutorial, you will learn how to:
- Create a new Project.
- Rename a project and/or project node.
- Remove a project and/or project node.
- Save project files that you have created.
Workspaces and Projects
In the Project Folders component there is a top-level object called a workspace. The workspace can contain one or more separate projects, and each project can contain opened data files and analysis results. An analogy might be that a workspace is like a drawer in a filing cabinet, and projects are individual folders in that drawer. Projects allow data to be grouped, for example by experiment. A project can contain many different types of data, for example microarray data, FASTA sequence files and graphical images. The workspace as a whole, with all its projects and data nodes, can be saved and restored. However, only one workspace can be open at one time.
Supported data formats
- Microarray
- Affymetrix MAS5/GCOS files - produced by the Affymetrix data analysis programs.
- Affymetrix File Matrix - a spreadsheet-type multi-experiment format; this is the native file type created by geWorkbench from merged datasets.
- Tab-delimited text (RMAExpress file) - A simple columnar file format, as produced by the program RMAExpress.
- Genepix .GPR files - Produced by a popular analysis program for two-color microarrays.
- Affymetrix CEL files - these files of probe level data can be viewed graphically in geWorkbench but not used directly for analysis.
- Other
- FASTA files. DNA or amino-acid sequence files in FASTA format.
- PDB files - protein 3-dimensional structure files can be viewed in the JMol Viewer in geWorkbench.
- NetBoost Edge List - used by a component still under development.
Microrray data and merging datasets
When working with microarray data, all data to be analyzed must be present within one data node in a project. If the data exists as multiple files containing results from single arrays, the data must be merged into a single node before it can be used. geWorkbench can perform this merging step either at the time data is read in, or later in a separate step. Once merged, such a dataset can be saved to disk; it will be saved in the geWorkbench matrix file format.
Data merging will be covered in the local and remote data tutorials.
Tutorial: Working with Projects
Creating a new project
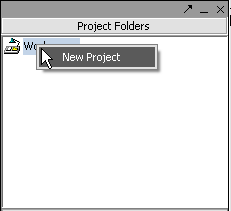
All data must belong to a project. Right-click on the Workspace entry in the Project Folders window at upper left to create a new project.
Renaming a project
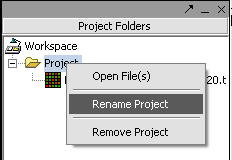
1. Right-click on Project folder.
2. Select Rename.
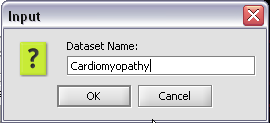
3. In the pop-up screen rename your project.
4. Click on the OK button
Renaming a project data node
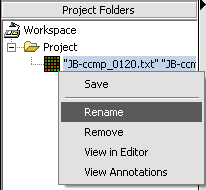
1. Right-click on a Project Folder data node.
2. Select Rename.
3. In the pop-up screen rename your data node.
4. Click on the OK button.
Removing a project
1. Right-click on Project folder.
2. Select Remove.
Removing a project data node
1. Right-click on the data node.
2. Select Remove.
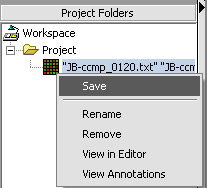
Saving a data node to a file
It is here that, among other things, you can create the matrix multi-experiment file format used by geWorkbench from a merged dataset.
1. Right-click on data node that you want to save.
2. Click Save.
A standard file Save screen will come up.
3. Choose a location.
4. Enter a name.
5. Click on the Save button.
