Difference between revisions of "T-test"
| Line 1: | Line 1: | ||
{{TutorialsTopNav}} | {{TutorialsTopNav}} | ||
| + | |||
| + | |||
| + | In this tutorial, you will: | ||
| + | |||
| + | * Get acquainted with the T Test and Multi T Test | ||
| + | * Apply a T Test and Multi T Test | ||
| + | |||
| + | |||
| + | |||
| + | Before you can continue, geworkbench should be running. Load the data as described in [[Tutorial - Projects and Data Files]]. | ||
| + | |||
| + | |||
| + | |||
| + | ==T Test== | ||
| + | |||
| + | T Test analysis identifies markers with statistically significant differential expression between sets of microarrays. The t-test determines for each marker if there is a significant difference between the two groups (case and control). To perform this analysis, you must classify the panels, set the analysis parameters and view the results in the visualization components. A detailed description of the T Test parameters is described in online help. | ||
| + | |||
| + | |||
| + | ===Classify the Sets=== | ||
| + | |||
| + | This process has already been described in [[Tutorial - Data Subsets]]. Briefly, | ||
| + | |||
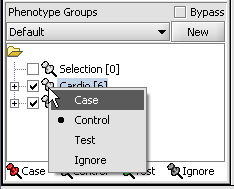
| + | 1. Mark the '''Cardio''' phenotype a 'Case'. By default, panels are marked as control. Panels classified Case are shown with a red thumbtack icon. | ||
| + | * Right-click on '''Cardio''' phenotype. | ||
| + | * Select '''Classification'''>'''Case'''. | ||
| + | 2. Activate the arrays '''Normal''' and '''Cardio''' by selecting the checkboxes next to the panel name. | ||
| + | |||
| + | |||
| + | |||
| + | [[Image:T_PhenotypeSettingCase.png]] | ||
| + | |||
| + | ===Set Analysis Parameters=== | ||
| + | # From the Analysis Panel, select '''T-Test Analysis'''. | ||
| + | # Populate the below parameters values and click on '''Analyze'''. | ||
| + | |||
| + | * Alpha-corrections tab: Just Alpha. | ||
| + | * P-Value Parameters tab: p-values based on t-distribution. Note that the default alpha (critical p-value) is set to 0.01. | ||
| + | * Degree of Freedom tab: Welch approximation - unequal group variances. | ||
| + | |||
| + | [[Image:Ttest.gif]]<br> | ||
| + | |||
| + | |||
| + | |||
| + | ===T-Test Results=== | ||
| + | |||
| + | |||
| + | |||
| + | {|style="border: 1px solid lightGray" | ||
| + | !|| || | ||
| + | |- | ||
| + | |- | ||
| + | | Markers which met the significance test are included in a new gene panel called “Significant Genes”. || [[Image:E_ttestgpanel.png]] | ||
| + | |- | ||
| + | |- | ||
| + | | Ancillary dataset is created in the project window. || [[Image:Ed_ttestproj.png]] | ||
| + | |- | ||
| + | |} | ||
| + | |||
| + | |||
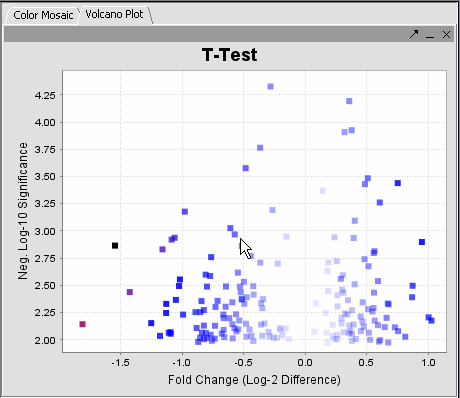
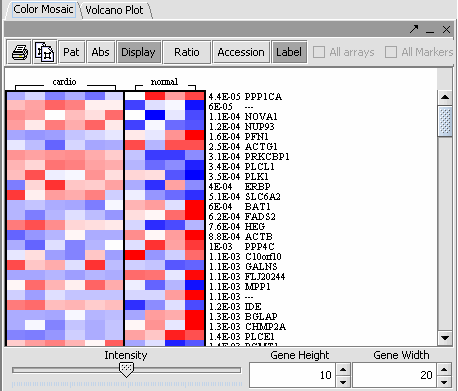
| + | The values of the T-Test can be seen in the Color Mosaic panel and the Volcano Plot. | ||
| + | |||
| + | |||
| + | {|style="border: 1px solid lightGray" | ||
| + | !VOLCANO PLOT||COLOR MOSAIC|| | ||
| + | |- | ||
| + | |-|- | ||
| + | |- | ||
| + | |- | ||
| + | | [[Image:Vplot.png]] || [[Image:Ed_cm.png]] | ||
| + | |- | ||
| + | |- | ||
| + | |- | ||
| + | | Clicking on any of the spots highlights the marker selected in the Marker Panel. * Insert another description || | ||
| + | * The label to the right displays the Significance value ( lower the value, most likely different) and gene name for the displayed genes. The genes are displayed in ascending order by Significance Value. | ||
| + | |||
| + | * Gene height and width values can be altered to modify the display. | ||
| + | |||
| + | * The intensity slider is used to modify the intensity of the color codings. | ||
| + | |||
| + | * Accession: Includes the accesion number in the label. | ||
| + | |||
| + | * Printer Icon: Prints the displayed image. | ||
| + | |||
| + | * Display: Must be toggled on to display data. | ||
| + | |||
| + | * ''Pat, Abs, Ratio Overlapping Pages Icon: Not the T Test display.'' | ||
| + | |||
| + | |- | ||
| + | |- | ||
| + | |} | ||
Revision as of 23:24, 27 February 2006
In this tutorial, you will:
- Get acquainted with the T Test and Multi T Test
- Apply a T Test and Multi T Test
Before you can continue, geworkbench should be running. Load the data as described in Tutorial - Projects and Data Files.
T Test
T Test analysis identifies markers with statistically significant differential expression between sets of microarrays. The t-test determines for each marker if there is a significant difference between the two groups (case and control). To perform this analysis, you must classify the panels, set the analysis parameters and view the results in the visualization components. A detailed description of the T Test parameters is described in online help.
Classify the Sets
This process has already been described in Tutorial - Data Subsets. Briefly,
1. Mark the Cardio phenotype a 'Case'. By default, panels are marked as control. Panels classified Case are shown with a red thumbtack icon.
- Right-click on Cardio phenotype.
- Select Classification>Case.
2. Activate the arrays Normal and Cardio by selecting the checkboxes next to the panel name.
Set Analysis Parameters
- From the Analysis Panel, select T-Test Analysis.
- Populate the below parameters values and click on Analyze.
- Alpha-corrections tab: Just Alpha.
- P-Value Parameters tab: p-values based on t-distribution. Note that the default alpha (critical p-value) is set to 0.01.
- Degree of Freedom tab: Welch approximation - unequal group variances.
T-Test Results
| Markers which met the significance test are included in a new gene panel called “Significant Genes”. | 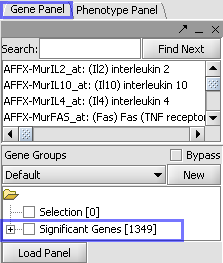
| |
| Ancillary dataset is created in the project window. | 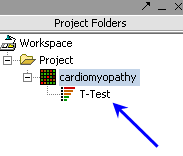
|
The values of the T-Test can be seen in the Color Mosaic panel and the Volcano Plot.
